

Send a payment from a web app
Send your first BitcoinSV (BSV) payment from code, using BSV Desktop on testnet. In this tutorial, you:
- Set up a BSV Desktop wallet on testnet and fund it with free coins.
- Connect an app to the wallet with the TypeScript SDK.
- Send 1,000 testnet satoshis and see the payment on the testnet explorer.
The example runs on its own and needs no existing project.
Before you begin
Make sure you have Node.js 22 or newer installed.
How it works
In this tutorial, the scripts connect.mjs and pay.mjs play the role of your app. They run in a terminal and talk to BSV Desktop through WalletClient from @bsv/sdk. In a web app, the same calls go in the front-end code. Before the payment, a faucet sends free testnet coins to your wallet, and after it, the testnet explorer shows the result.
This is how the payment itself moves:
- 1Your app
Asks for 1,000 satoshis with
createAction - 2BSV Desktop
Signs after you click Authorize. The private key stays here
- 3Testnet
Receives the signed transaction and records it
- 4Your app
Gets the transaction ID back from the wallet
Set up a testnet wallet
The first step is to set up BSV Desktop on testnet. The steps follow BSV Desktop 3.3.1, and the screens come from BSV Desktop 3.1.1 and 3.3.1.
Install BSV Desktop
Download the installer for your system, run it, and open the app.
Trust the local certificate
When the app opens for the first time, the SSL Certificate Trust dialog asks to add a certificate to your system. Click Trust Certificate and confirm the system prompt, or click Not Now. Either choice works for the scripts in this tutorial.
Create the wallet
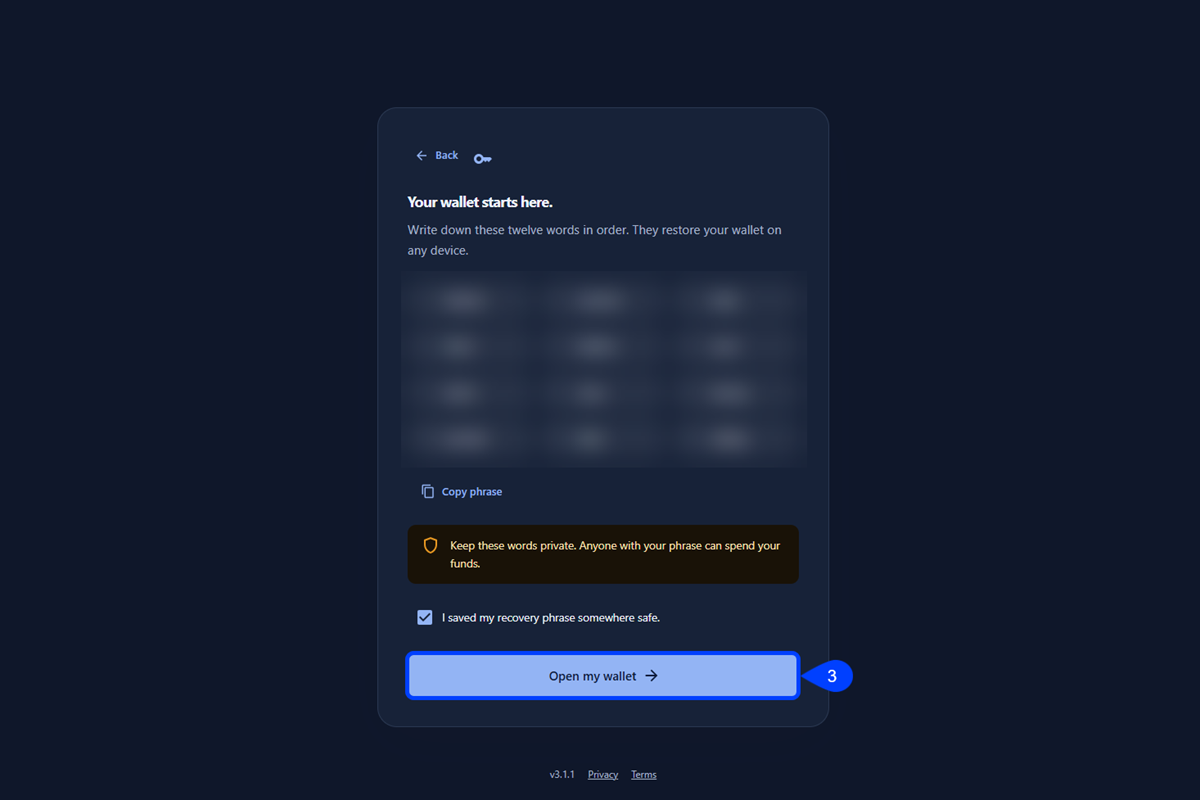
Click Create a wallet. The next screen shows the twelve words of your recovery phrase.
The recovery phrase restores your wallet, so keep it private. Never share it or paste it into code.
Write the words down in order and keep them somewhere safe. Then select I saved my recovery phrase somewhere safe. and click Open my wallet.
Protect the wallet
In Protect your wallet, enter a password in Device password and Confirm device password, and click Protect my wallet. The app asks for this password each time it opens.
Switch the network to testnet
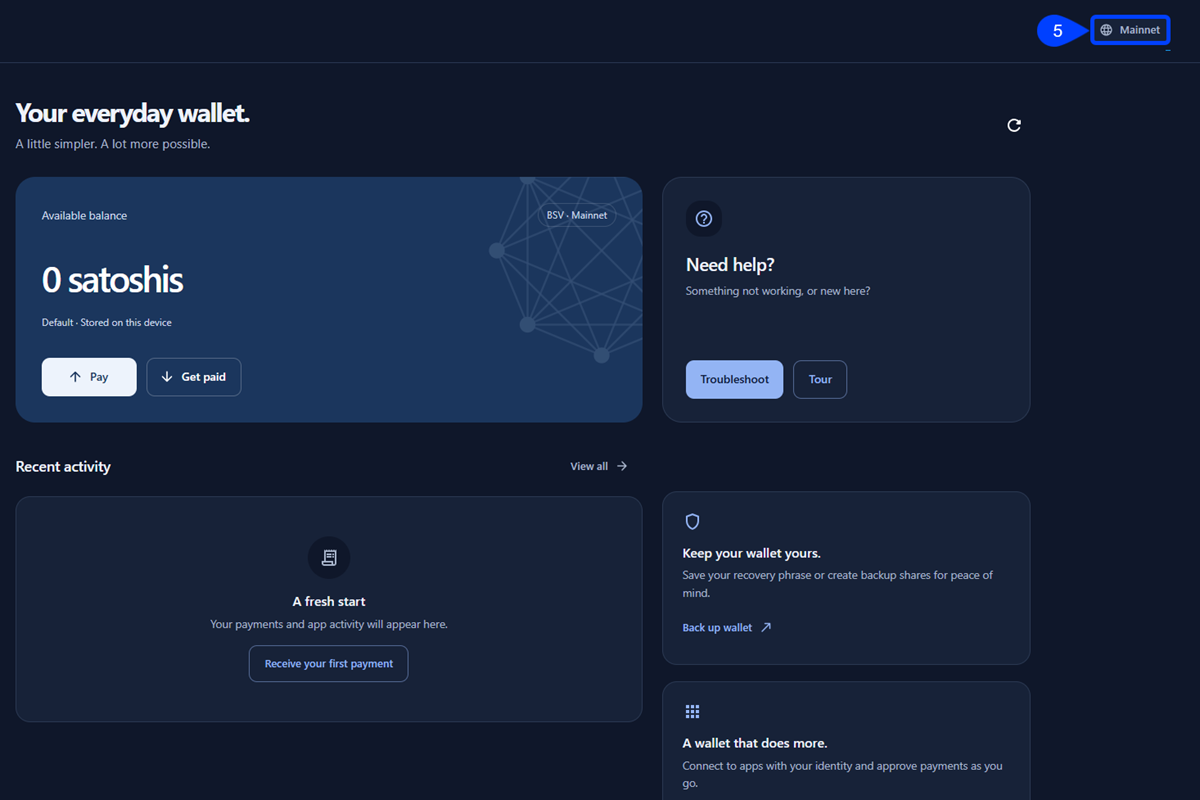
The wallet opens on Mainnet. Click Mainnet at the top right of the Wallet page.
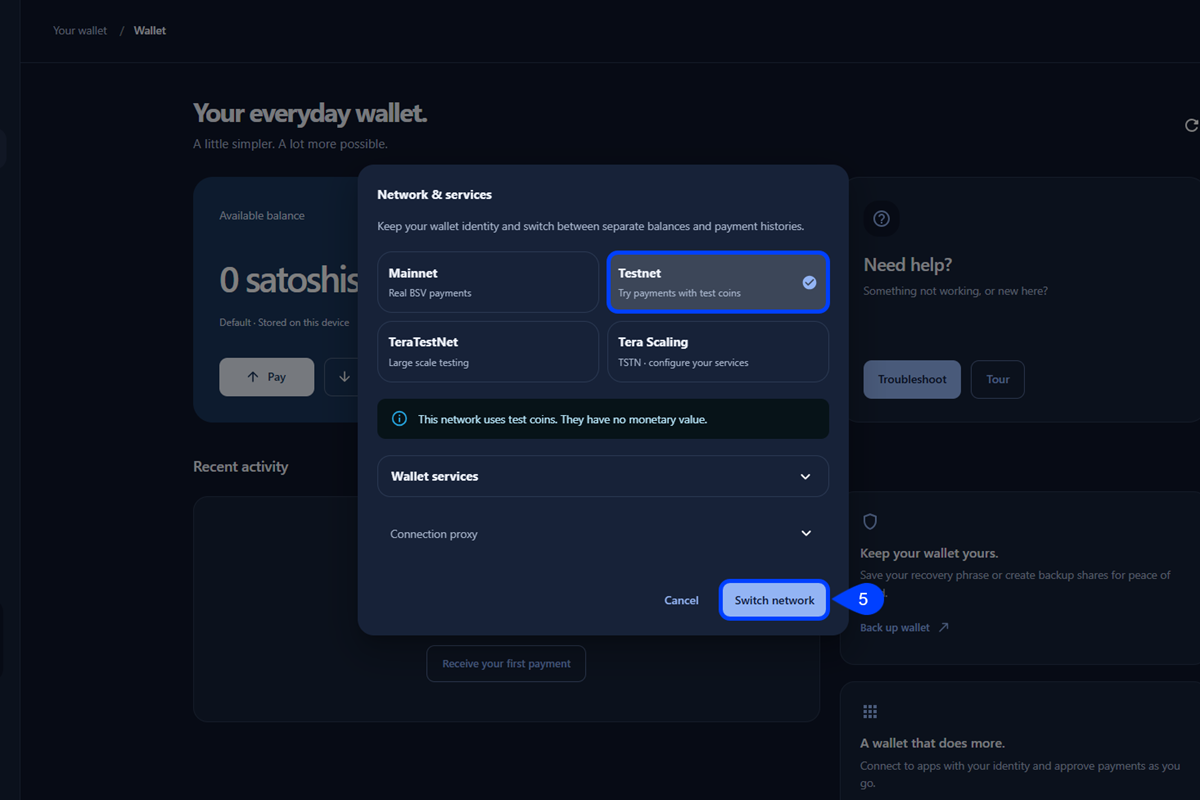
In Network & services, select Testnet and click Switch network. Leave Wallet services and Connection proxy as they are. Each network keeps its own balance and payment history, so the coins you get next show only on testnet. The app shows Testnet is ready, and the balance shows BSV · TEST.
Copy your testnet address
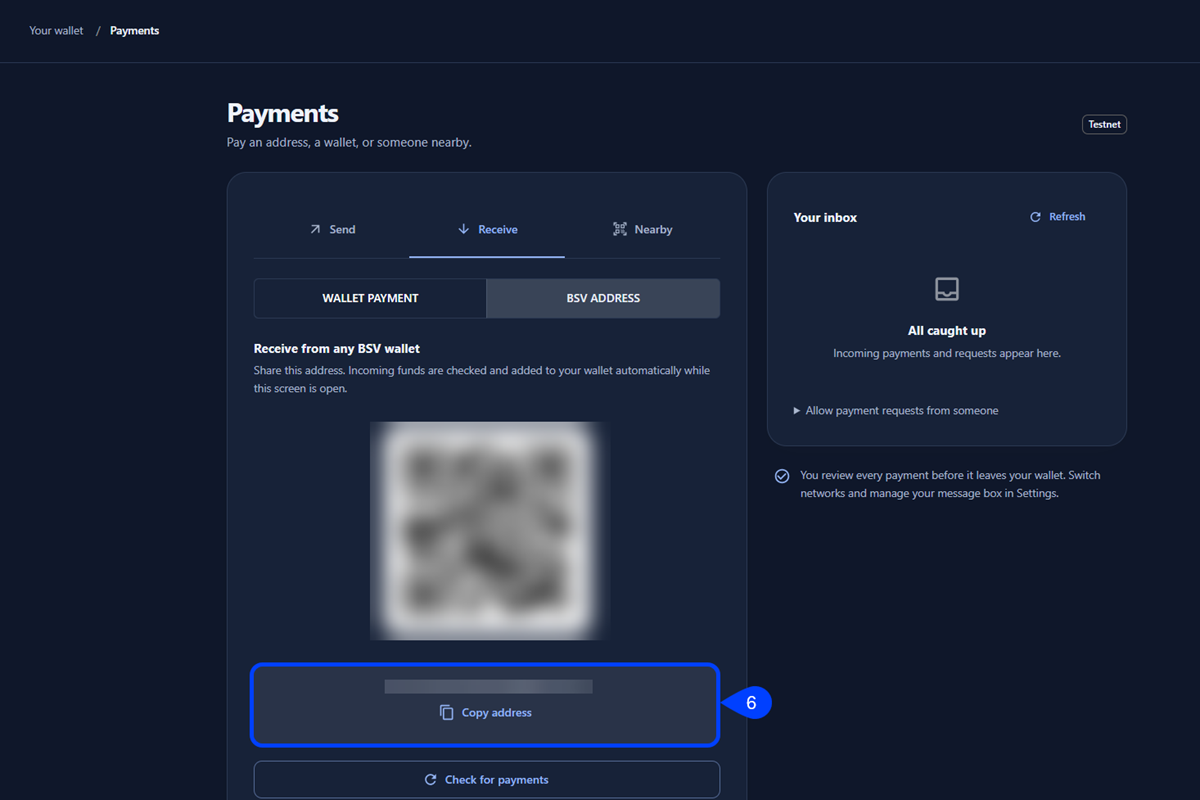
On the Wallet page, click Get paid, open the BSV ADDRESS tab and copy the address with Copy address. A testnet address starts with m or n. Keep this screen open while you request the coins, since BSV Desktop adds incoming payments to your wallet while it is open.
Get free testnet coins
Your new wallet is empty. Take these steps to get free testnet coins from the BSV faucet:
Sign in to the faucet
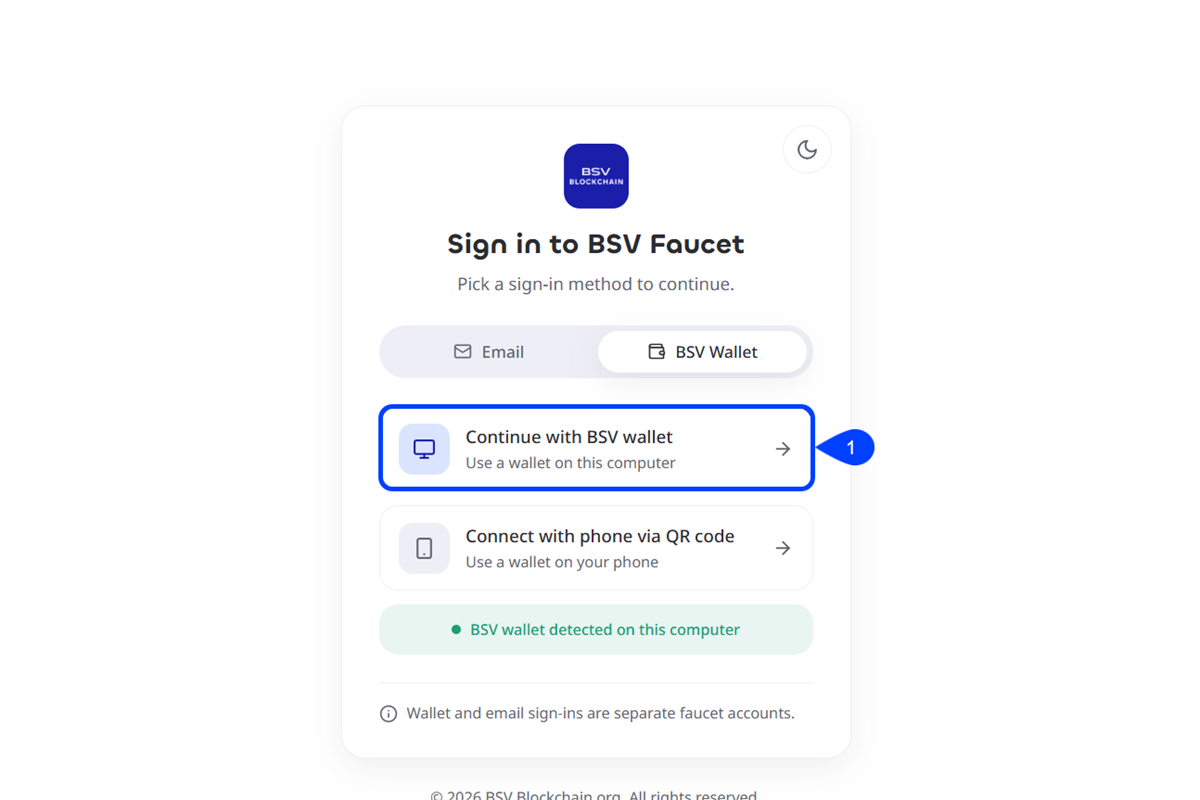
Open bsvfaucet.com, click Get testnet BSV, and sign in with Continue with BSV wallet. If the browser asks to access other apps and services on this device, allow it, so the faucet can find your wallet.
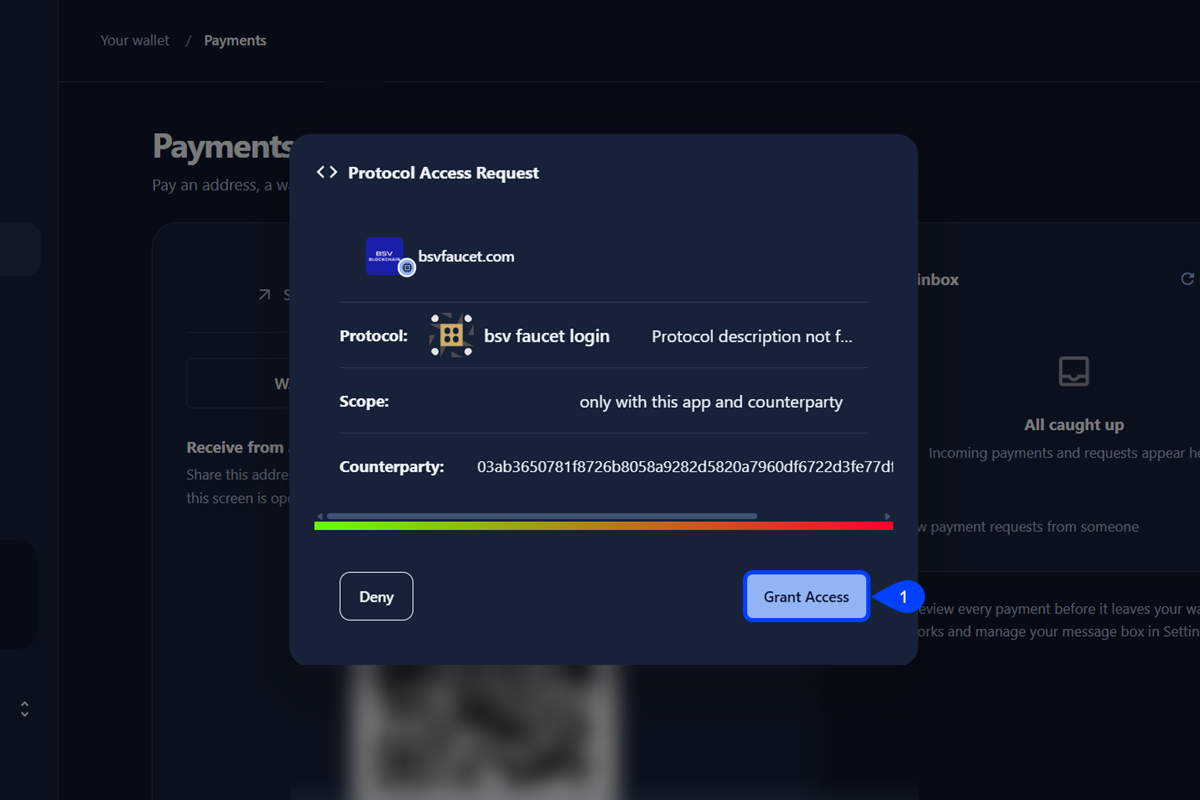
BSV Desktop shows a Protocol Access Request from bsvfaucet.com for the bsv faucet login protocol. Click Grant Access.
Request testnet coins
On the faucet page, paste your address in Destination address, enter an amount such as 1000000, and click Request BSV.
The amount is in satoshis, not BSV. A satoshi is the smallest unit of BSV, and 100,000,000 satoshis make 1 BSV, so 1 requests a single satoshi.
The faucet confirms with a Successfully sent message and a transaction ID.
The faucet allows up to 10,000,000 satoshis per request and one request every 24 hours.
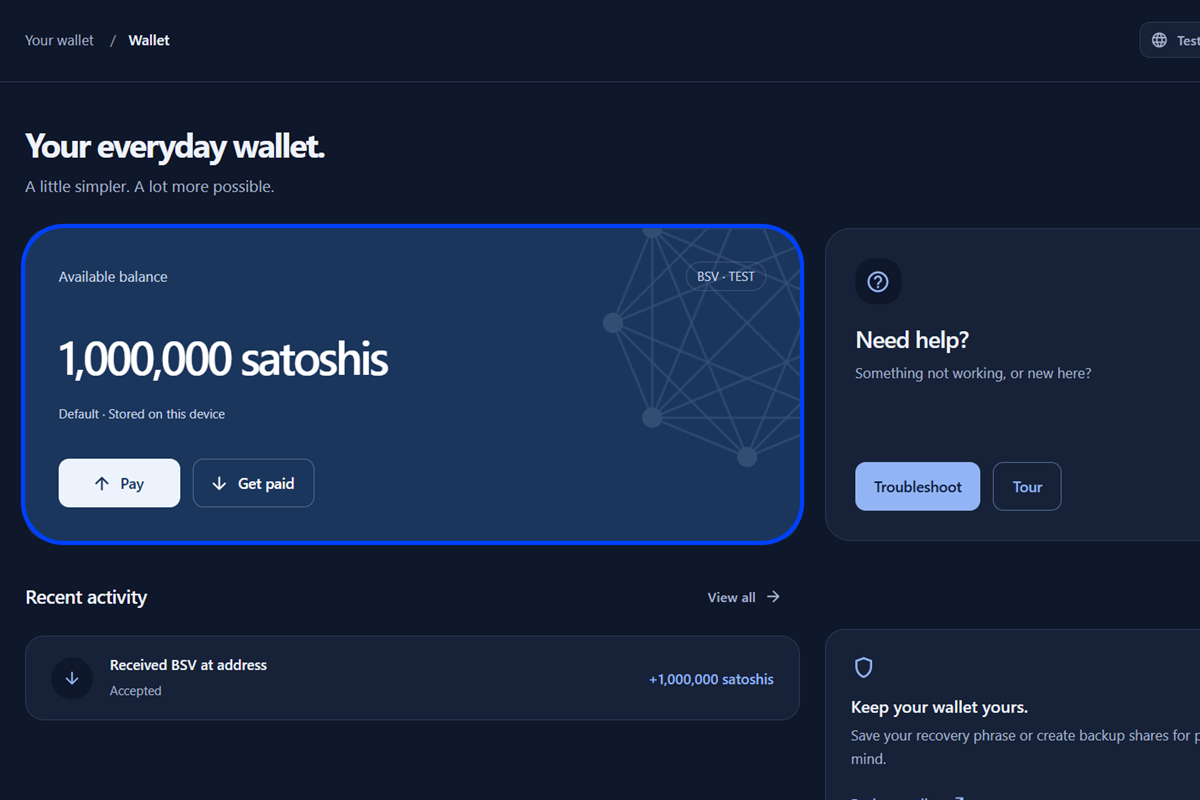
BSV Desktop adds the coins to your wallet, and the amount shows under Available balance on the Wallet page.
Connect your app to the wallet
With the testnet wallet set up, create the project of your app in a terminal and connect it to the wallet:
Install the SDK
Open a terminal in an empty folder, then create a project and install the SDK. This tutorial was tested with @bsv/sdk 3.2.1:
npm init -y
npm install @bsv/sdkWrite the connection script
Create a file named connect.mjs in the same folder. This script is the part of your app that finds the wallet and reads from it:
import { WalletClient } from '@bsv/sdk'

const wallet = new WalletClient('auto', 'example.com')

const { publicKey } = await wallet.getPublicKey({ identityKey: true })
console.log('Identity key:', publicKey)

const { network } = await wallet.getNetwork()
console.log('Network:', network)Two parts of the script are worth knowing:
new WalletClient('auto', 'example.com')finds the wallet available on your machine. The second value,example.com, is the name of your app. The wallet shows it whenever your app asks for something, such as a payment approval, and scripts run with Node.js must include it.getPublicKey({ identityKey: true })asks the wallet for its identity key, the public key that identifies the wallet.
Run the script
With BSV Desktop open and unlocked, run the script:
node connect.mjsThe output looks like this, with your own key:
Identity key: <66 character public key>
Network: testnetYour app is now connected to the wallet and can read from it on testnet. These calls only read from the wallet, so they cost nothing and BSV Desktop does not ask you to approve them.
Send your first payment
Take these steps to send 1,000 satoshis to your own testnet address and see the payment on the testnet explorer. The coins come back to your wallet, so only the fee is spent:
Have your testnet address ready
Use the address you copied in the first section, or copy it again on the Wallet page of BSV Desktop with Get paid, the BSV ADDRESS tab and Copy address.
Write the payment script
Create a file named pay.mjs in the same folder as connect.mjs. This script is the part of your app that asks the wallet for a payment:
import { P2PKH, WalletClient } from '@bsv/sdk'

const wallet = new WalletClient('auto', 'example.com')

const address = 'YOUR_TESTNET_ADDRESS'
const lockingScript = new P2PKH().lock(address).toHex()

const { txid } = await wallet.createAction({
  description: 'Pay my own address',
  outputs: [{
    satoshis: 1000,
    lockingScript,
    outputDescription: 'payment to my address'
  }]
})

console.log('Transaction ID:', txid)
console.log('Explorer:', `https://test.whatsonchain.com/tx/${txid}`)Replace YOUR_TESTNET_ADDRESS with the address you copied. Check it before you run the script, since a sent transaction cannot be reversed.
Two parts of the script do the work:
new P2PKH().lock(address)builds the locking scriptThe part of a transaction output that sets the condition to spend it of the payment, which sends the coins to your address. P2PKHPay to Public Key Hash is the standard way to lock coins to an address.createActionasks the wallet to create the payment. The wallet chooses the coins, adds the fee, and signs.
Run the script and approve the payment
Run the script:
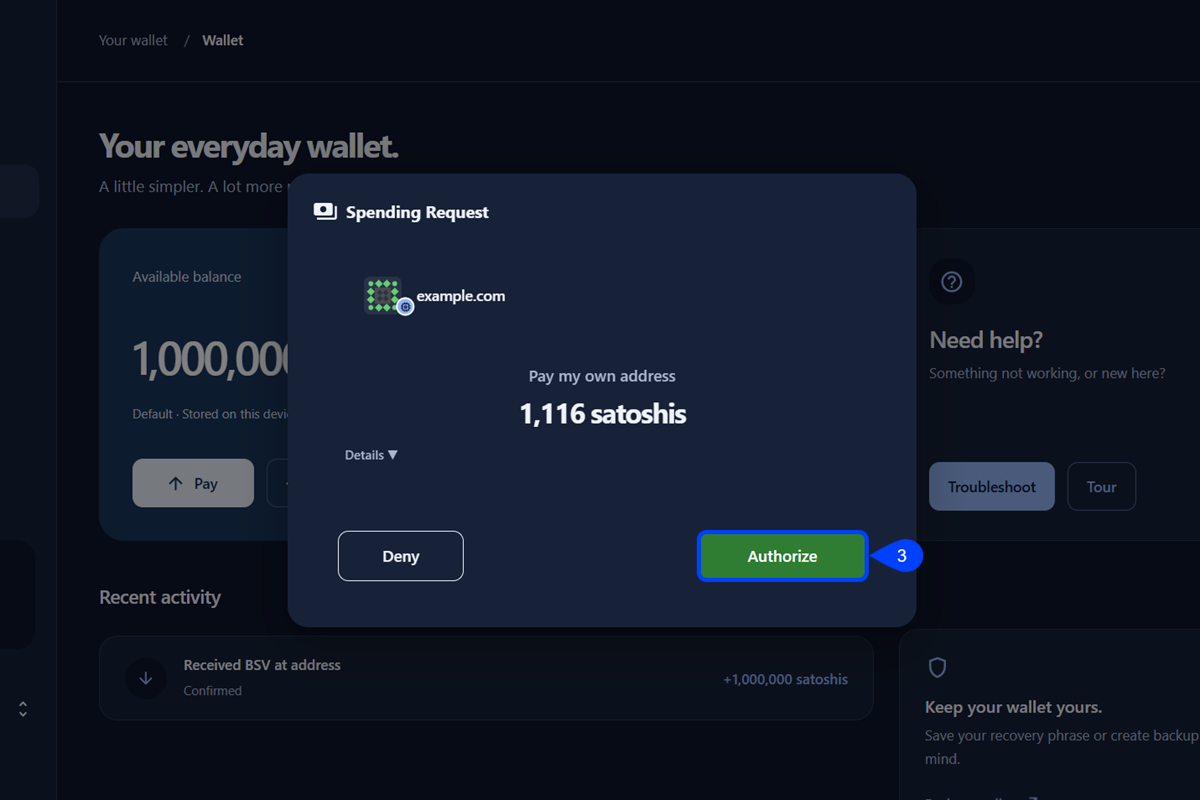
node pay.mjsThe script waits with no output until you approve the payment in BSV Desktop. The app opens a Spending Request window on top of its main screen, with the app name, example.com, the payment description, and the total with the fee. If you do not see it, switch to the BSV Desktop window, since it can stay behind the terminal. Click Authorize.
After you approve, the script prints the transaction ID and a link to the testnet explorer, WhatsOnChain:
Transaction ID: <64 character transaction ID>
Explorer: https://test.whatsonchain.com/tx/<64 character transaction ID>Verify the payment on the testnet explorer
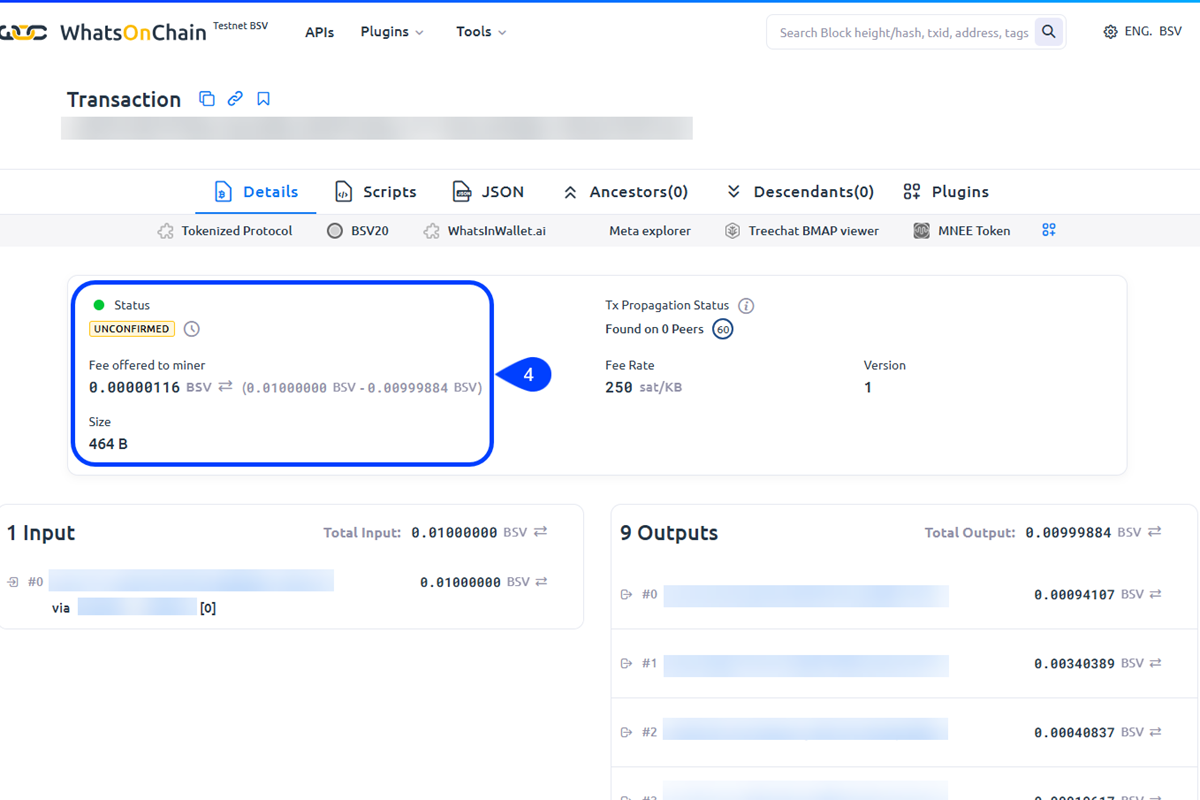
Open the explorer link from the output. The page shows your transaction on the BSV blockchain testnet. If the explorer shows This page cannot be found, it has not listed the payment yet, so wait a minute and reload.
Add the payment back to your balance
The 1,000 satoshis went to your own address, so your Available balance first goes down by the amount plus the fee. To add the amount back, click Get paid on the Wallet page, open the BSV ADDRESS tab, then click Check for payments. BSV Desktop shows Received 1 address payment.
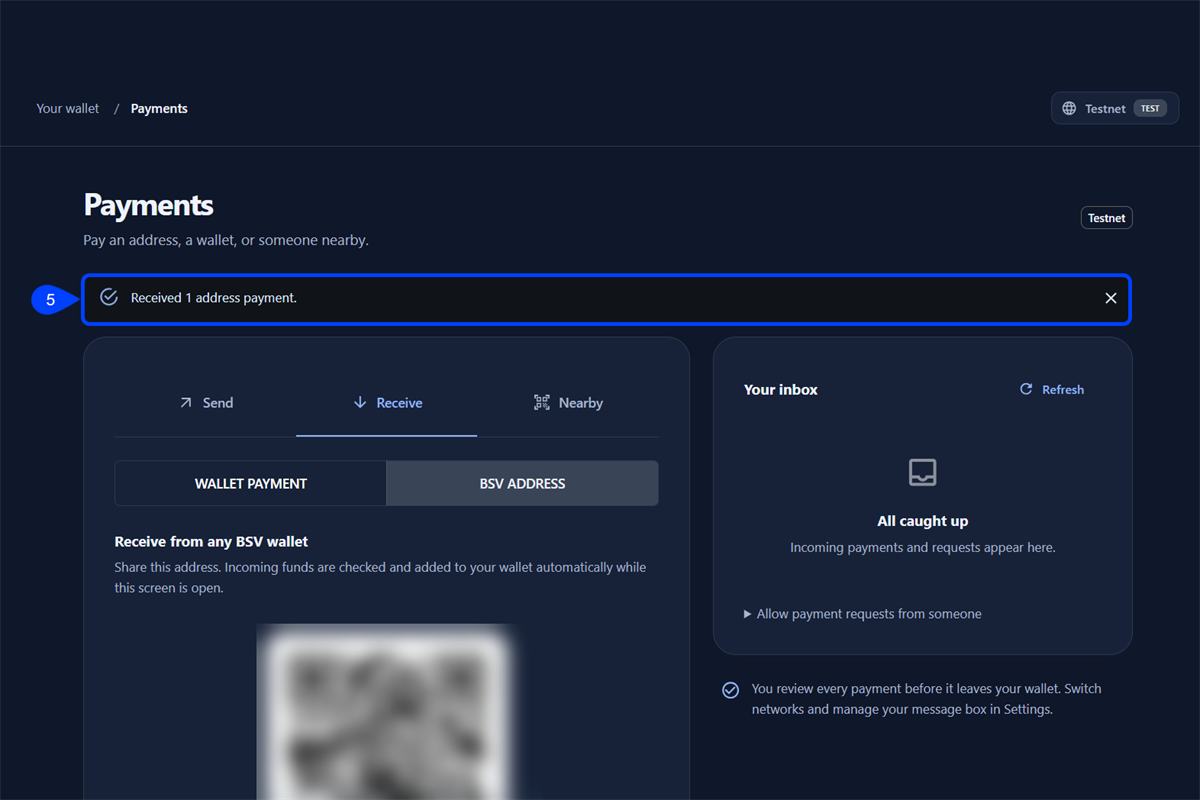
Your Available balance is now lower than before the payment only by the fee.
You have sent a first BSV payment from code, approved it in your wallet, and verified it on the testnet. In your own app, the same WalletClient calls stay in your code, and each user approves the payments in their own wallet, as you did in BSV Desktop. To see what happened behind each call, read Understand how your transaction worked.
Troubleshooting
The script fails with "No wallet available over any communication substrate" #
This message means the script cannot reach BSV Desktop, usually because the app is closed or locked. Open BSV Desktop, unlock it with your device password, and run the script again.
The faucet shows "Couldn't verify wallet" #
Another wallet installed as a browser extension can answer the faucet before BSV Desktop. Turn off that extension while you sign in, keep BSV Desktop open and unlocked, and click Continue with BSV wallet again.
A payment fails with "HTTP status 400" #
This error means BSV Desktop did not complete the payment, either because you clicked Deny or because your balance does not cover the amount plus the fee. Check your balance in BSV Desktop, then run the script again and click Authorize.
Next steps
With a first payment sent, build on the same flow: