

Move your app to mainnet
Move a working testnet app to Mainnet, the live BSV blockchain, and end with an empty Mainnet wallet that your app can read and is ready to fund. Do this once the app runs end to end on testnet, since a payment on Mainnet spends real BSV and cannot be undone. The steps apply to any app from Build your app.
Before you begin
You need BSV Desktop with the wallet you used on testnet. For a server wallet, you also need a new private key for Mainnet, stored in an environment variable and never in your code.
How it works
The wallet decides the network. An app that uses WalletClient asks BSV Desktop to build and sign each transaction, so the app follows whatever network Desktop is on. A server wallet owns its key and decides in its own code.
Press a network to see what follows it.
WalletClient
One wallet, separate balances
Try payments with test coins
Real BSV payments
{ network: 'testnet' }ServerWallet
The network option in your code
Try payments with test coins
BSV Desktop is on Testnet. The server wallet is set to testnet, which is Testnet.
BSV Desktop keeps one wallet with a separate balance and payment history for each network.
Switch your app to Mainnet
An app that uses WalletClient needs the first two sections, and an app with a server wallet needs the last one.
Switch BSV Desktop to Mainnet
The first step is to open the network settings in BSV Desktop:
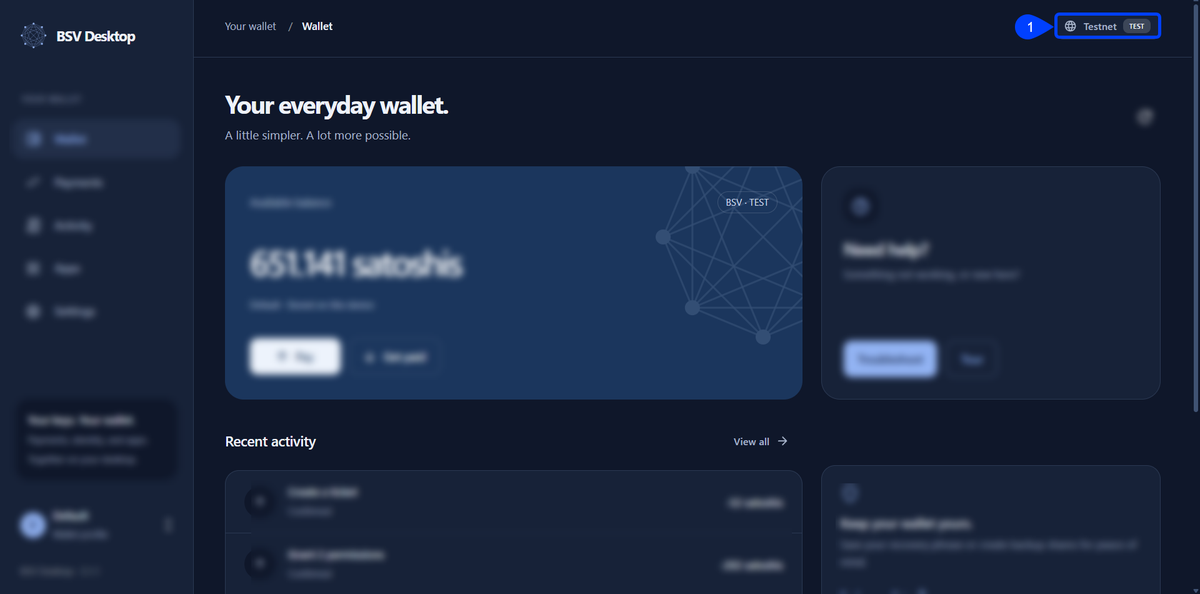
Open the network settings
At the top right of the Wallet page, click Testnet. Network & services opens with the available networks.
Switch to Mainnet
Select Mainnet and click Switch network. BSV Desktop switches at once, with no password and no restart.
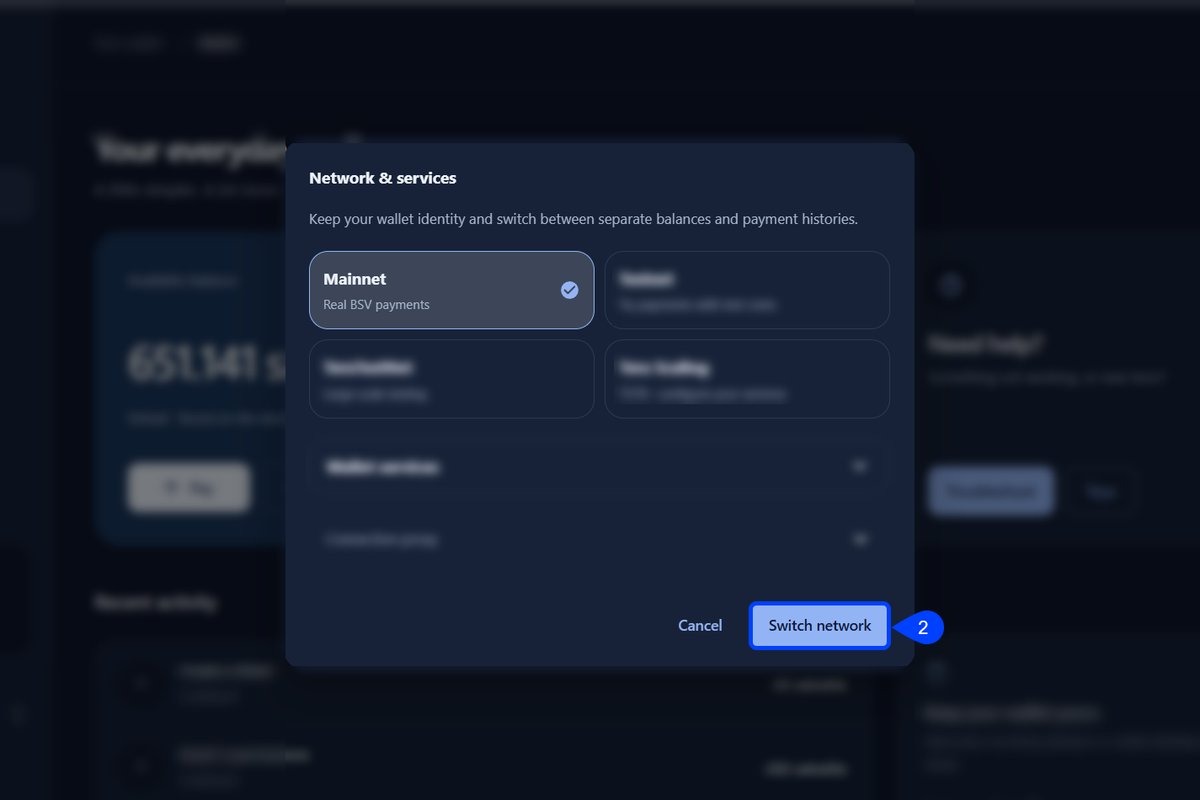
After the switch, the network button at the top right reads Mainnet, the balance card is labeled BSV · Mainnet, and the balance is 0 satoshisThe smallest unit of BSV. 100,000,000 satoshis make 1 BSV..
To go back, repeat the steps and select Testnet. The testnet balance and history are as you left them.
Check the network from your app
Before the app spends anything, ask the wallet which network it is on. Read it from the wallet, not from the format of an address:
Read the network
In your app project, create check-network.ts. It connects to BSV Desktop and prints the network:
import { WalletClient } from '@bsv/sdk'

const wallet = new WalletClient('auto', 'localhost')
const { network } = await wallet.getNetwork({})
console.log(network)With BSV Desktop open, run it with npx tsx check-network.ts. The output is the network of the wallet.
mainnetThe second argument of WalletClient is the originator, the name BSV Desktop shows for your app. BSV Desktop answers testnet or mainnet. The wallet does not adapt to what your code expects, so compare the answer with the network you intend and stop if they differ.
A payment from an empty Mainnet wallet fails before BSV Desktop opens an approval window. See Troubleshooting for the error.
Point a server wallet at Mainnet
A server wallet decides the network in its own code, so a testnet app has to change it:
Set the network and the storage
In the file that creates the wallet, change network to 'main' and storageUrl to a Mainnet storage server:
import { ServerWallet } from '@bsv/simple/server'

const wallet = await ServerWallet.create({
  privateKey: process.env.SERVER_PRIVATE_KEY!,
  network: 'main',
  storageUrl: process.env.STORAGE_URL!
})Set SERVER_PRIVATE_KEY to the new Mainnet key and STORAGE_URL to your Mainnet storage server. Both values are read from the environment. The ! tells TypeScript the value is set.
The testnet URL from the examples serves testnet only. The SDK page lists the public Wallet Infra endpoints that store Mainnet wallets.
ServerWallet.create accepts 'main' and 'testnet' and throws on anything else. It defaults to 'main', so a testnet server app has to pass network on purpose.
If you use @bsv/wallet-toolbox directly, the chain is 'main' or 'test', and Setup.getEnv reads MAIN_TAAL_API_KEY for 'main' and TEST_TAAL_API_KEY for 'test'.
Prepare the Mainnet wallet
Fund the Mainnet wallet and make sure you can recover it.
Get real BSV
Real BSV for the Mainnet wallet comes from buybsv.com, which sells BSV for card or bank payments:
BSV sent to a wrong address cannot be recovered, so check the address you copy from the Mainnet wallet before you use it.
Open Get paid
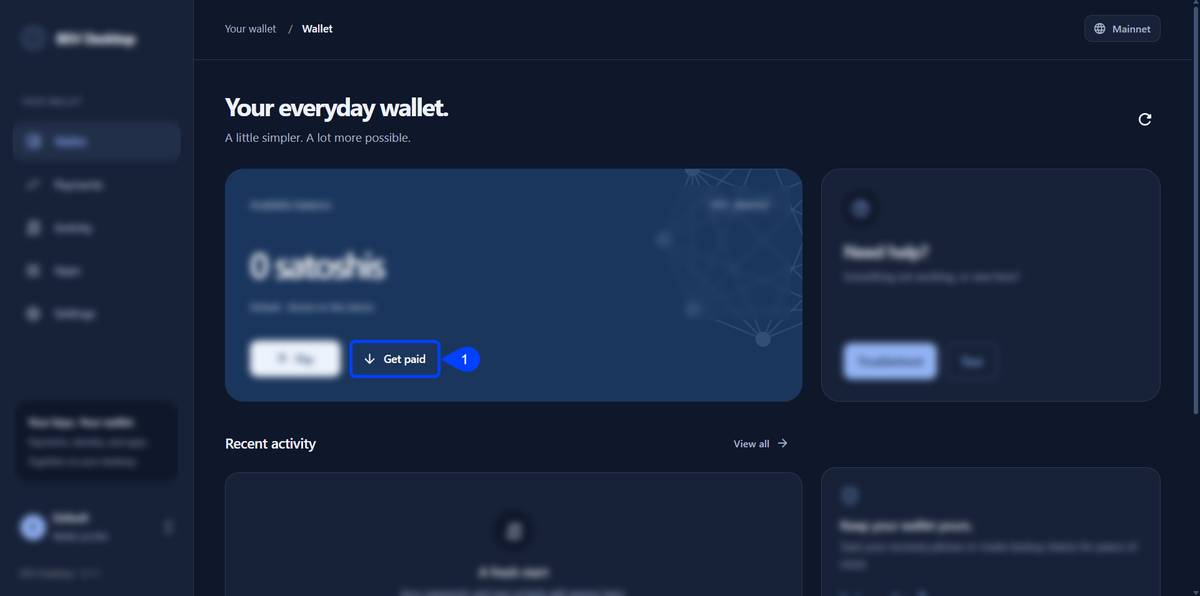
In BSV Desktop on Mainnet, click Get paid on the Wallet page.
Copy the address
Copy the address with Copy address.
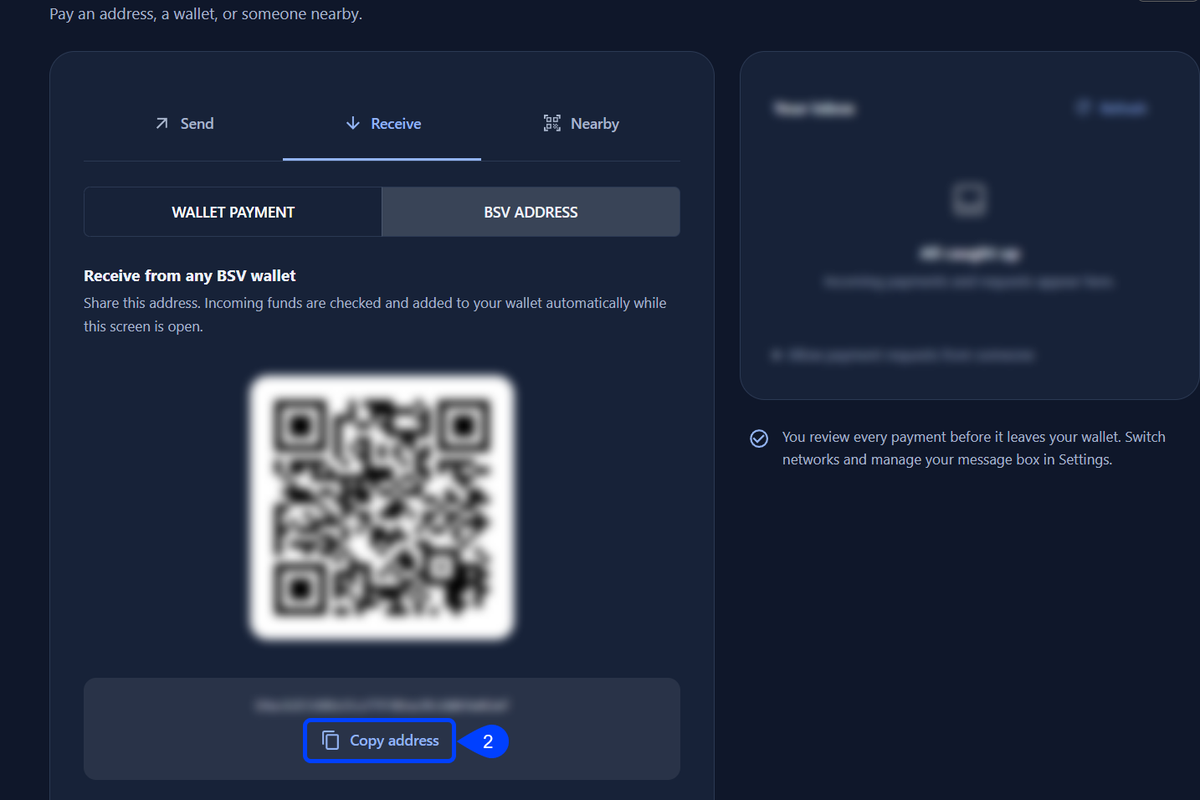
On buybsv.com, paste the address when the site asks for your wallet address. Currencies, countries, minimum amounts, fees and delivery times belong to the service and can change, so check them on the site before you plan around them.
Back up the wallet
In BSV Desktop the backup screen is one click from the Wallet page:
Open the backup screen
On the Wallet page, click Back up wallet in the Keep your wallet yours. card to open Back up your wallet.
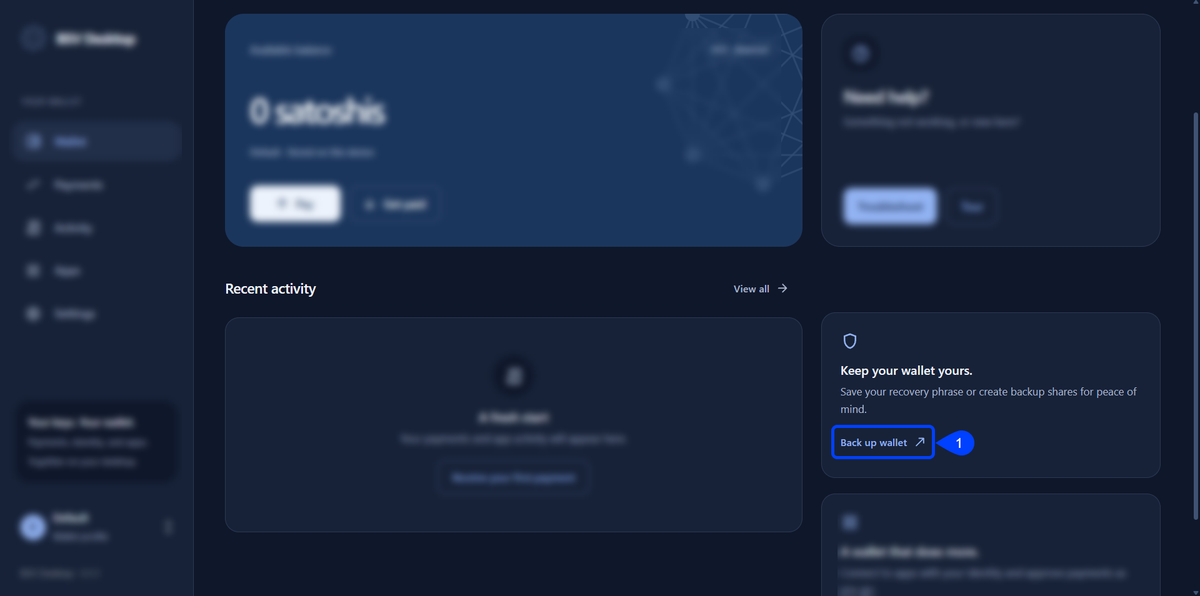
The page has two cards. The Recovery phrase card holds 24 words that bring the wallet to a new device, shown with Show recovery material. The Keep your wallet data, too. card exports a wallet data file with Export wallet data, which keeps the transaction history and the local records that the phrase does not recover.
Keep the recovery phrase private and offline, and never paste it into code, a terminal or a file you commit. Anyone who has it can access the wallet.
Troubleshooting
Payment fails with `WERR_INSUFFICIENT_FUNDS` #
The wallet on the network you are on has no funds for the amount and the fee. The message reads Insufficient funds in the available inputs to cover the cost of the required outputs and the transaction fee and names the satoshis needed, not the network. Read the network with getNetwork, then check the balance in BSV Desktop.
Next steps
With the app on Mainnet, charge for your API with real BSV, or go deeper into the stack:
- Gate an API behind payments
- Track transactions with overlays
- Integrate the BSV blockchain with web frameworks