

Time Anchor
Run the Time Anchor on your computer to record the SHA-256 hash of a file in a transaction on the BSV blockchain, find it again through an overlay serviceA service built from topic managers and lookup services, which tracks the outputs of a topic and, if you want, keep an encrypted copy with UHRPUniversal Hash Resolution Protocol, content storage addressed by the hash of the file. A BRC-100BSV Request for Comments 100, the standard interface between apps and wallets wallet creates the transaction, and you can later check whether a file matches what you recorded. The source code is in bsv-blockchain-demos/desktop-integrity-app.
When to use it
Use the Time Anchor when you are building an app that anchors file hashes on the blockchain and you want to see how the three parts work together in code. The demo runs on your computer.
What it does
The app has one screen for each job:
| Screen | What it does |
|---|---|
| Save Files | Records the hash of a file of up to 25 MiB in a transaction and, with the UHRP option on, stores an encrypted copy of the file. |
| Verify Files | Hashes a file you select and looks for a recorded transaction with the same hash. |
| Recall Files | Downloads the encrypted copy and decrypts it with the wallet that saved it. |
| Logs | Lists the local records of the app: the file name, the transaction ID, the key identifier, the file metadata and the UHRP URL. |
A matching hash shows that a file has the same bytes as the file you recorded. It does not show who wrote the file or when it was created.
How it works
Three services take part when you save a file, and each one can succeed or fail on its own.
The hash transaction
The app asks the wallet to create the transaction with createAction. The transaction has one output of 1 satoshi, the smallest unit of BitcoinSV (BSV), and 100,000,000 satoshis make 1 BSV. Its locking scriptThe part of a transaction output that sets the condition to spend it is OP_FALSE OP_RETURN followed by the SHA-256 hash of the file. The wallet signs the transaction and pays for it, so the app never handles a private key.
The overlay record
After the wallet returns the transaction, the app submits it to the overlay topic tm_desktopintegrity in the background and retries up to three times. The Verify Files screen then queries the lookup service ls_desktopintegrity with the hash of the file. A transaction ID alone does not show that the overlay accepted the transaction.
The encrypted copy
The Enable Recall (UHRP) option is on by default. When it is on, the wallet encrypts the file and the app asks a UHRP storage host to keep it for 30 days. The app saves the key identifier in the log, so Recall Files can decrypt the copy later.
The upload is separate from the hash transaction, so one can succeed while the other fails. How long a UHRP copy stays available depends on the host and on the retention period you request, so keep your own copy of any file you need.
Which network it uses
The app has no network setting, and it creates the transaction on the network of the connected wallet. It sends the overlay submission and the upload to two services, and you can change their addresses in the settings drawer of the app:
| Service | Default |
|---|---|
| Overlay | https://overlay-us-1.bsvb.tech |
| UHRP storage | https://go-uhrp-us-1.bsvblockchain.tech |
The app keeps the addresses in local storage and clears it when you quit, so set them again after each restart.
The overlay and the UHRP host must accept the network of your wallet, and the transaction is created either way. When the UHRP host does not accept it, the UHRP URL column of the Status table shows Failed. When the overlay does not, Verify Files shows File is not verified. The default hosts in the table above do not accept testnet, so on testnet you see both results. No public overlay on testnet runs every topic, so to verify a file on testnet, set the overlay address in the settings drawer to a host that runs the topic tm_desktopintegrity. Track with overlays shows how to start a local host.
Run it locally
The app needs Node.js 22.12 or newer, npm and a BRC-100 wallet that is running, unlocked and funded. This page uses BSV Desktop set to testnet. To switch the network and fund the wallet with free testnet coins, follow Send a payment from a web app.
Use a small file with nothing sensitive in it. The hash is recorded on the blockchain, and a transaction cannot be undone. The app shows the content of the file in a preview, and in development mode it also writes the content to its console.
Start the renderer
In a terminal, clone the repository, install the dependencies and start the Vite development server:
git clone https://github.com/bsv-blockchain-demos/desktop-integrity-app.git
cd desktop-integrity-app
npm ci
npm run devnpm ci prints a few deprecation warnings and an audit summary, which you can ignore here, and ends with a line like this:
added 494 packages, and audited 495 packages in 36snpm run dev then prints the address of the server. Keep that port free, because the desktop app always loads it:
VITE v7.0.2  ready in 457 ms

➜ Local: http://localhost:5173/Open the desktop app
In a second terminal, in the same folder, compile and launch the Electron app:
npm run electronThe terminal first compiles the Electron files and then launches the app. It prints the commands it runs and one line with the local path of the compiled files:
> desktop-file-integrity@0.0.0 electron
> npm run build:electron && npx electron dist-electron/electron/main.js

> desktop-file-integrity@0.0.0 build:electron
> tsc -p tsconfig.electron.json && tsc -p tsconfig.preload.json

__dirname <path to the folder>\dist-electron\electronA window titled File Integrity opens. The button Wallet Connected appears at the bottom left when the app reaches the wallet. Opening the Vite address in a regular browser is not enough, because the file dialogs and the logs use the Electron interface.
Select a file
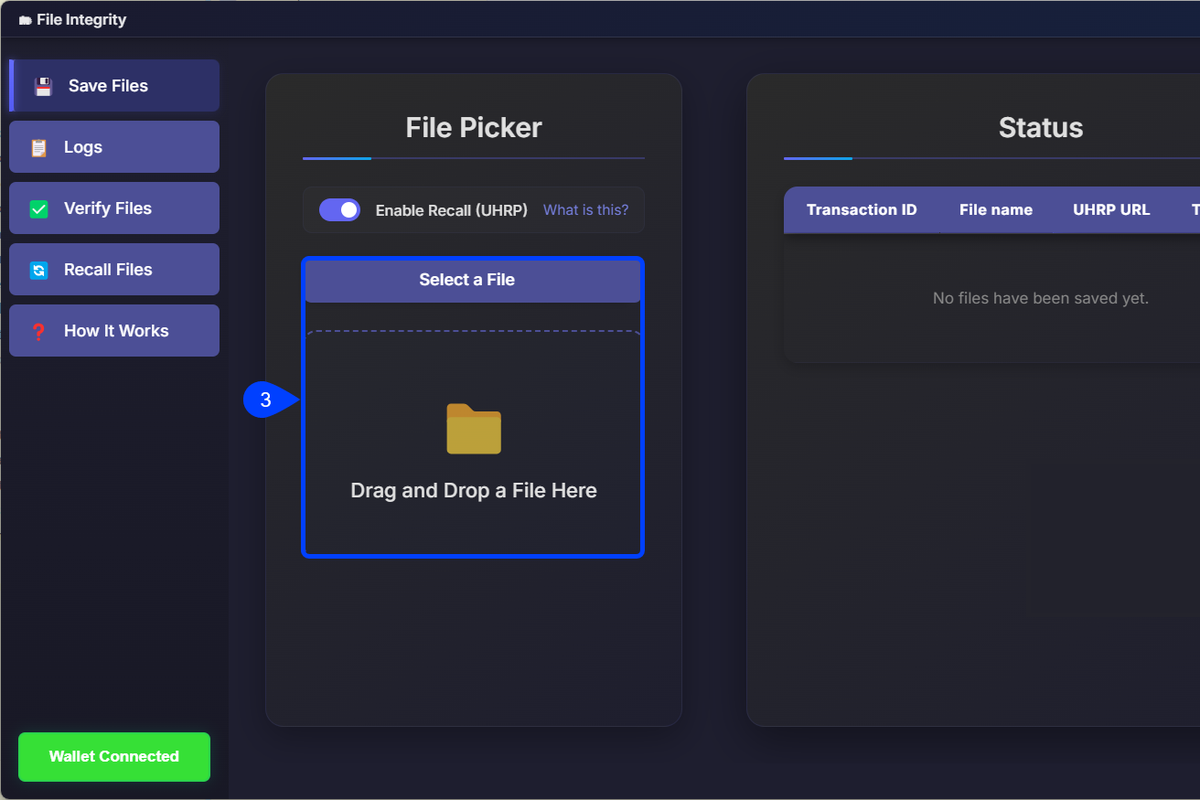
In Save Files, click Select a File or drop the file on Drag and Drop a File Here, and choose a small test file. A Preview panel shows its content.
Save the file
The Enable Recall (UHRP) option decides whether the encrypted copy is uploaded. Click Save to blockchain. BSV Desktop opens a Spending Request window with the amount, which is the 1 satoshi output plus the transaction fee. Click Authorize to approve it.
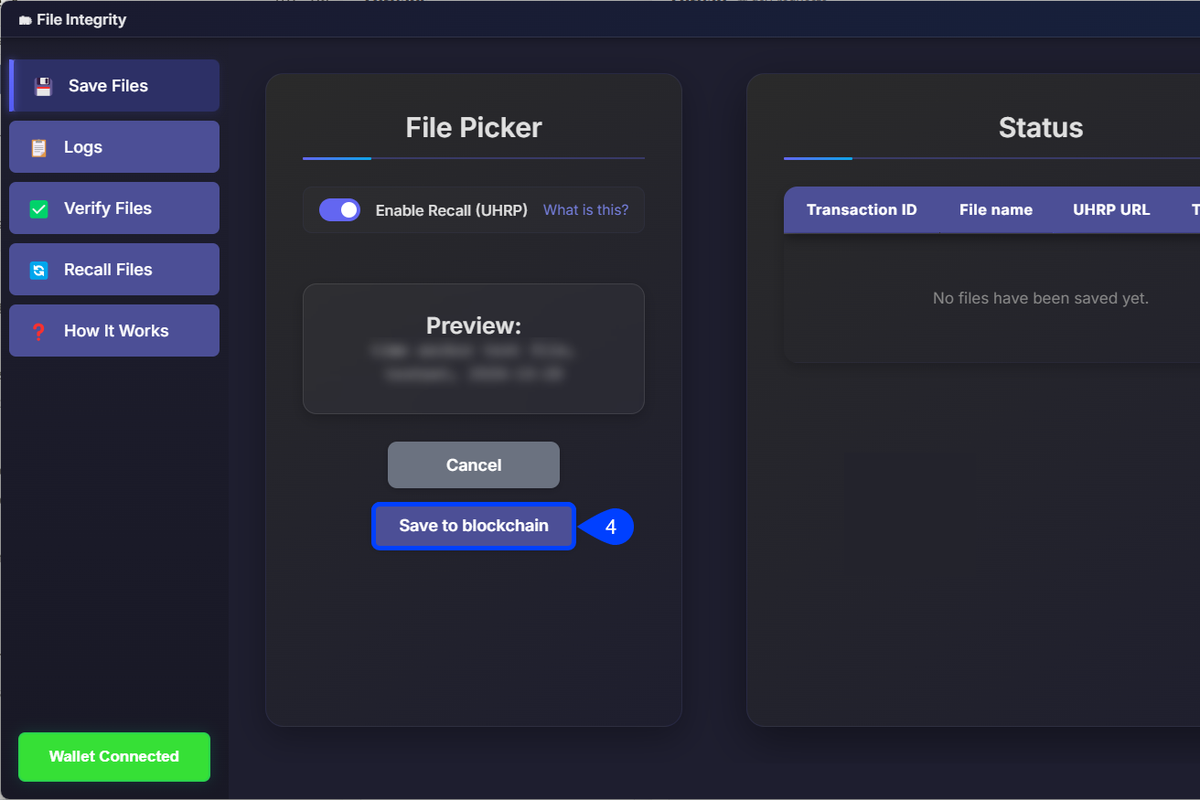
A row appears in the Status table with the Transaction ID, shortened because the full ID is in the log of the file, the File name, the UHRP URL and the Timestamp. On testnet with the default hosts, the UHRP URL shows Failed and the transaction is created anyway.
Verify the file
Open Verify Files and select the same file. The result appears under the Preview, and a file with no matching record shows File is not verified. On testnet with the default overlay, a file you just saved shows it too, as the warning in “Which network it uses” explains.
Recall the file
When the UHRP URL of the saved file is not Failed, open Recall Files, select its log or enter its UHRP URL, and save the decrypted result. On testnet with the default host it is Failed, so skip this step.
In development, the app writes its logs to the LOGS folder of the project, and a packaged app writes them to the logs folder in the Electron application data directory.
How it is built
The Time Anchor is an Electron app with a React and TypeScript renderer built with Vite. These files hold the logic:
context/fileContext.tsxpublishes the file, runs the optional upload and creates the log.hooks/transactions.tscreates the hash transactions and queries the overlay.utils/UHRPManager.tsencrypts and uploads the file, resolves the hosts and checks the integrity of a download.electron/main.tsopens the window, reads the files and keeps the logs.
The code is under the Open BSV License version 6, which limits its use to the BSV blockchain, and the full terms are in LICENSE.md.
Related articles
To learn more about the parts the Time Anchor uses on the BSV blockchain, review these articles: