

Request permissions and organize outputs
Group the outputs your app creates with baskets, tags and labels, and see which windows BSV Desktop shows the user. At the end, a standalone Node script has created two tagged outputs in a basket and listed them back by basket, tag and label. Use this when your app keeps its own outputs, such as tickets or receipts, and must tell them apart from the rest of the wallet.
Before you begin
You need Node.js 22 or newer and a testnet wallet in BSV Desktop with some test coins. Send a payment from a web app shows how to set one up. The example installs @bsv/sdk in its first step and is written against version 3.2.1.
How it works
A BRC-100 wallet such as BSV Desktop keeps every UTXOUnspent transaction output it owns, and an app asks the wallet to create and list them. Three fields let the app organize what it creates:
| Field | Applies to | Set with | Read with | What the user is asked |
|---|---|---|---|---|
basket | One output | basket on the output of createAction | listOutputs with basket | A Basket Access Request, once per basket name |
tags | One output | tags on the output of createAction | listOutputs with tags | Nothing |
labels | The whole transaction | labels on createAction | listActions with labels | A Protocol Access Request for each label, named action label <label> |
A transaction that spends from the wallet also opens a Spending Request.
Each basket or label permission the user grants is stored by the wallet as a transaction of its own, which costs the user a network fee of about 120 to 170 satoshis in BSV Desktop 3.1.1.
Turn on the basket and label requests
BSV Desktop 3.1.1 shows only the Spending Request by default. To see the basket and label windows while you develop, switch them on:
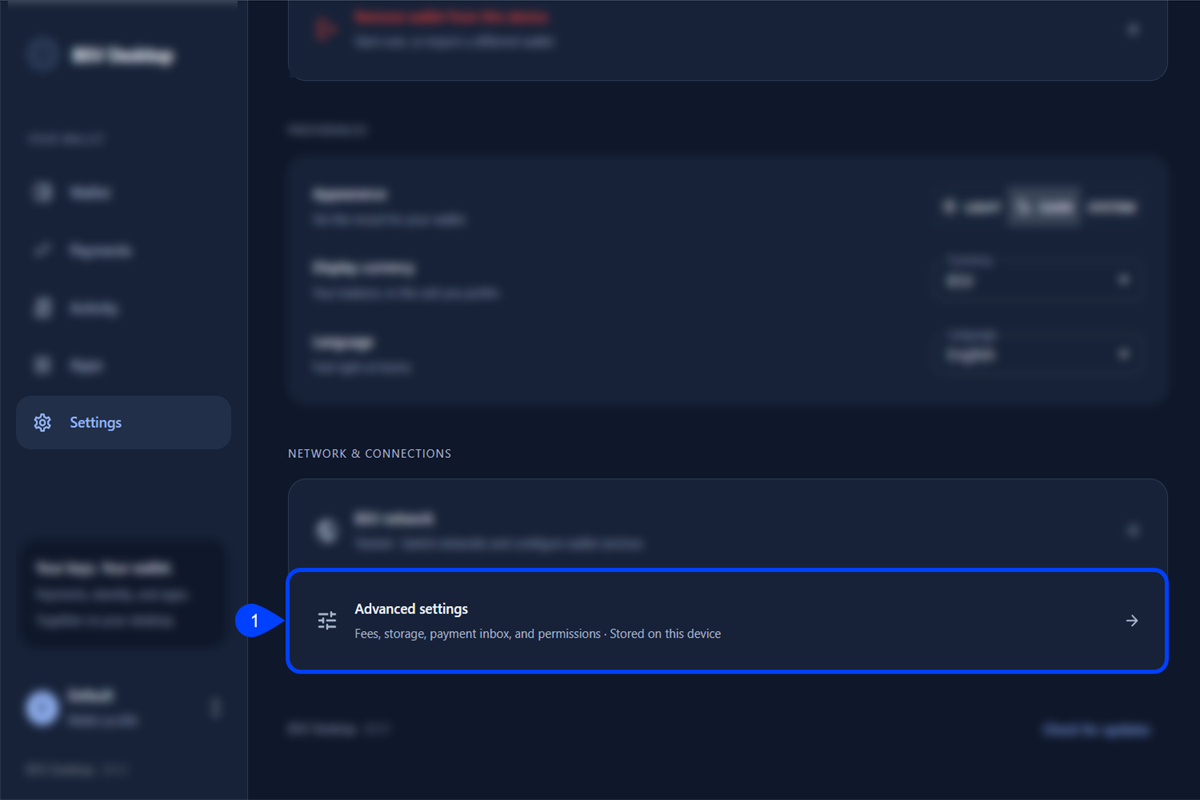
In BSV Desktop, select Settings and open Advanced settings.
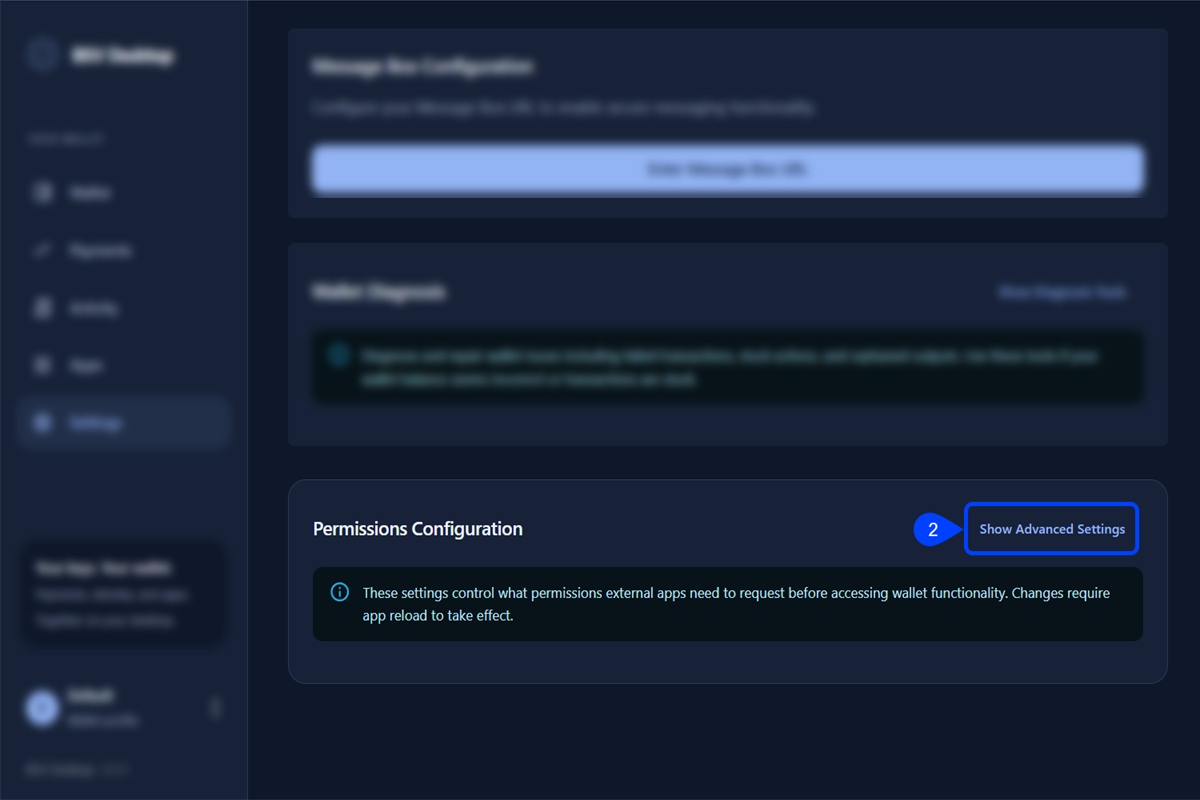
In Advanced settings, scroll to Permissions Configuration and select Show Advanced Settings.
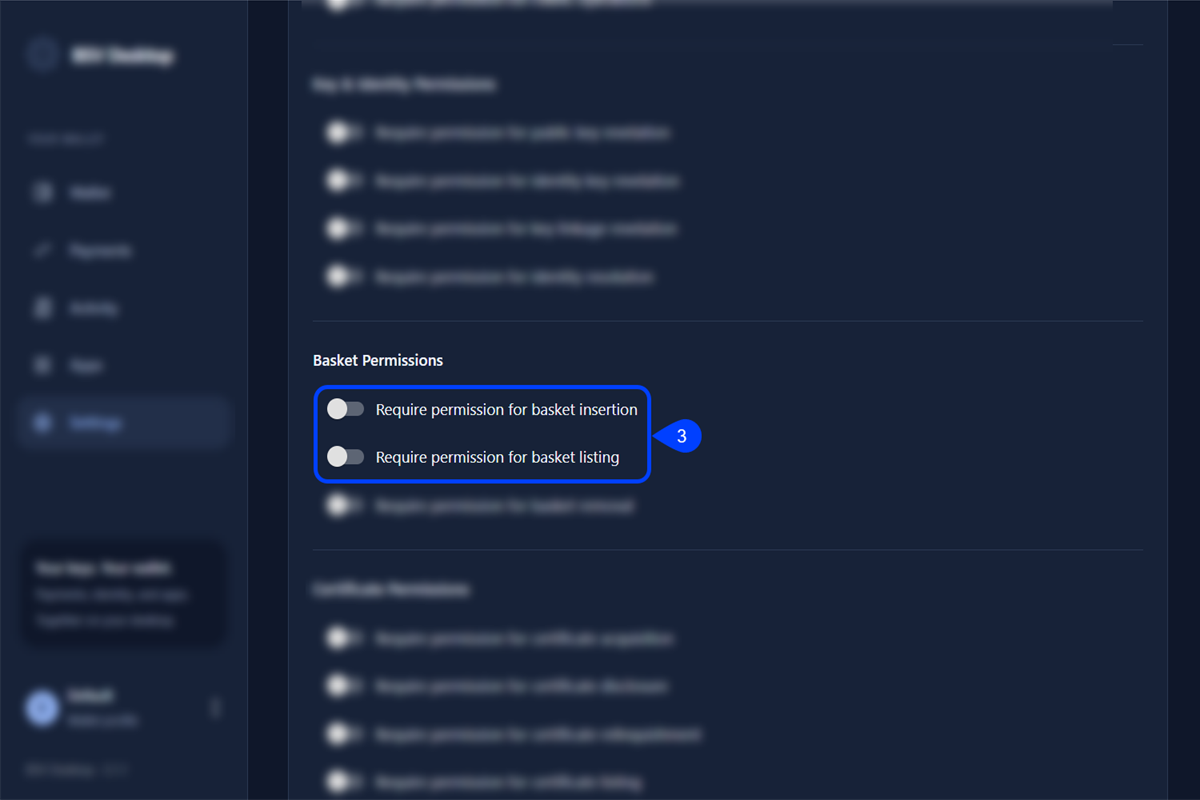
Switch on Require permission for basket insertion and Require permission for basket listing under Basket Permissions.
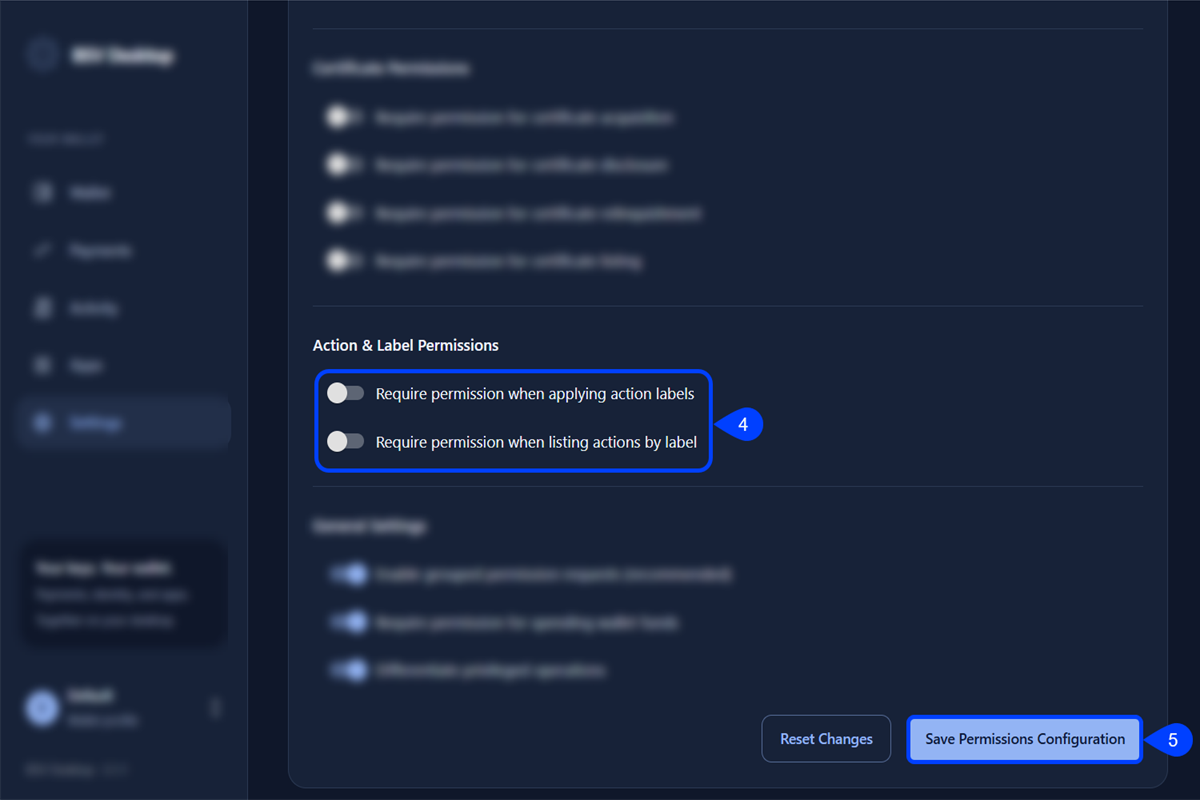
Select Save Permissions Configuration. BSV Desktop notes that changes require an app reload to take effect.
Every user chooses these settings for their own wallet, so your app cannot assume which windows appear.
Organize outputs with baskets, tags and labels
Create the outputs with the three fields, then read them back with filters.
Create outputs in a basket
With the basket and label requests on, the first step is to create two outputs in one transaction and answer what BSV Desktop asks:
Install the SDK
In an empty folder, install the package:
npm install @bsv/sdkWrite the script
Create outputs.mjs in the same folder. The script connects to BSV Desktop and asks it to create two one satoshi outputs in the basket tickets:
import { WalletClient, Script } from '@bsv/sdk'

const wallet = new WalletClient('auto', 'tickets.localhost')
const lockingScript = Script.fromASM('OP_NOP').toHex()

const { txid } = await wallet.createAction({
  description: 'Create two tickets',
  labels: ['batch one'],
  outputs: [
    { satoshis: 1, lockingScript, outputDescription: 'Ticket A', basket: 'tickets', tags: ['vip', 'row a'] },
    { satoshis: 1, lockingScript, outputDescription: 'Ticket B', basket: 'tickets', tags: ['general', 'row a'] }
  ]
})

console.log({ txid })The second argument of WalletClient is the originator, the name BSV Desktop shows to the user and the name every permission is stored under. In a browser the page origin is used. In Node you pass a name of your own, and without one the call fails. An output locked with OP_NOP has no spending condition, so anyone can spend it. Use the locking script your app needs in a real project.
Run the script
Run the script from the same folder:
node outputs.mjsThe script waits while BSV Desktop opens three windows, one after the other, and each one needs an answer.
Grant the basket access
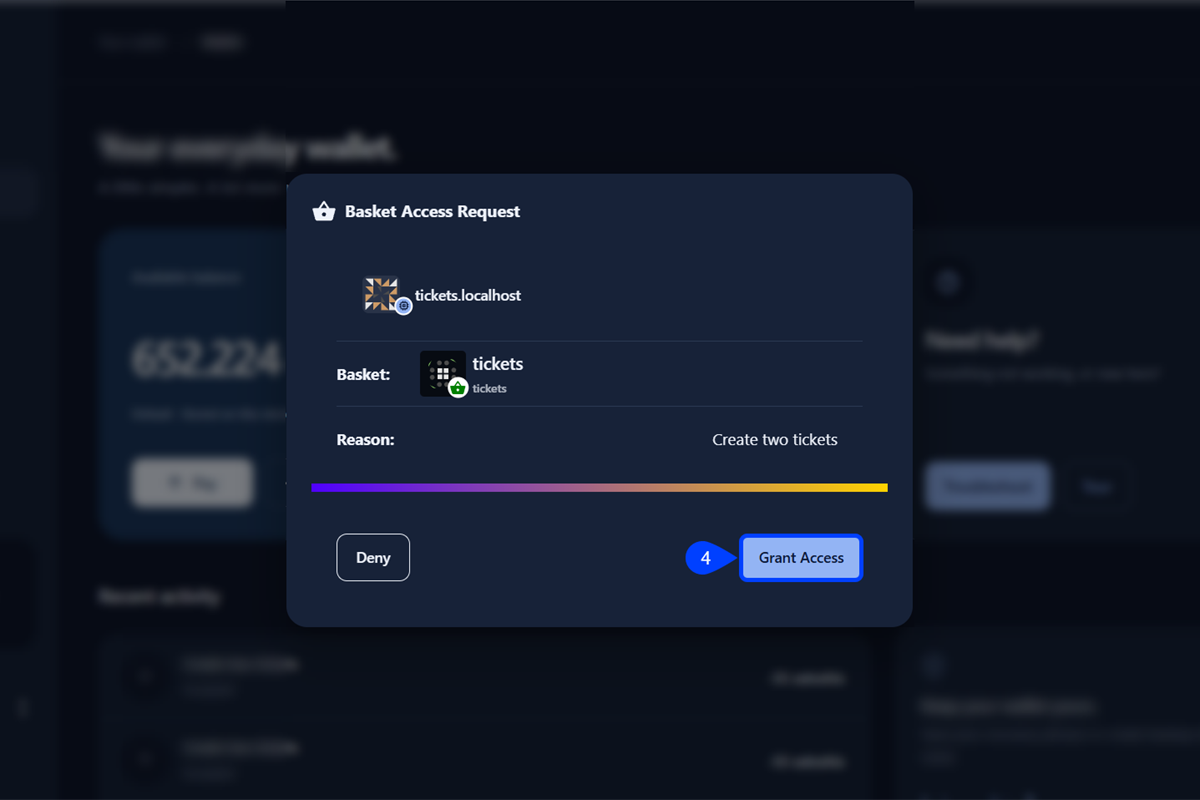
BSV Desktop first opens a Basket Access Request for the app tickets.localhost and the basket tickets. The reason it shows is the description of the action. Select Grant Access.
Grant the label access
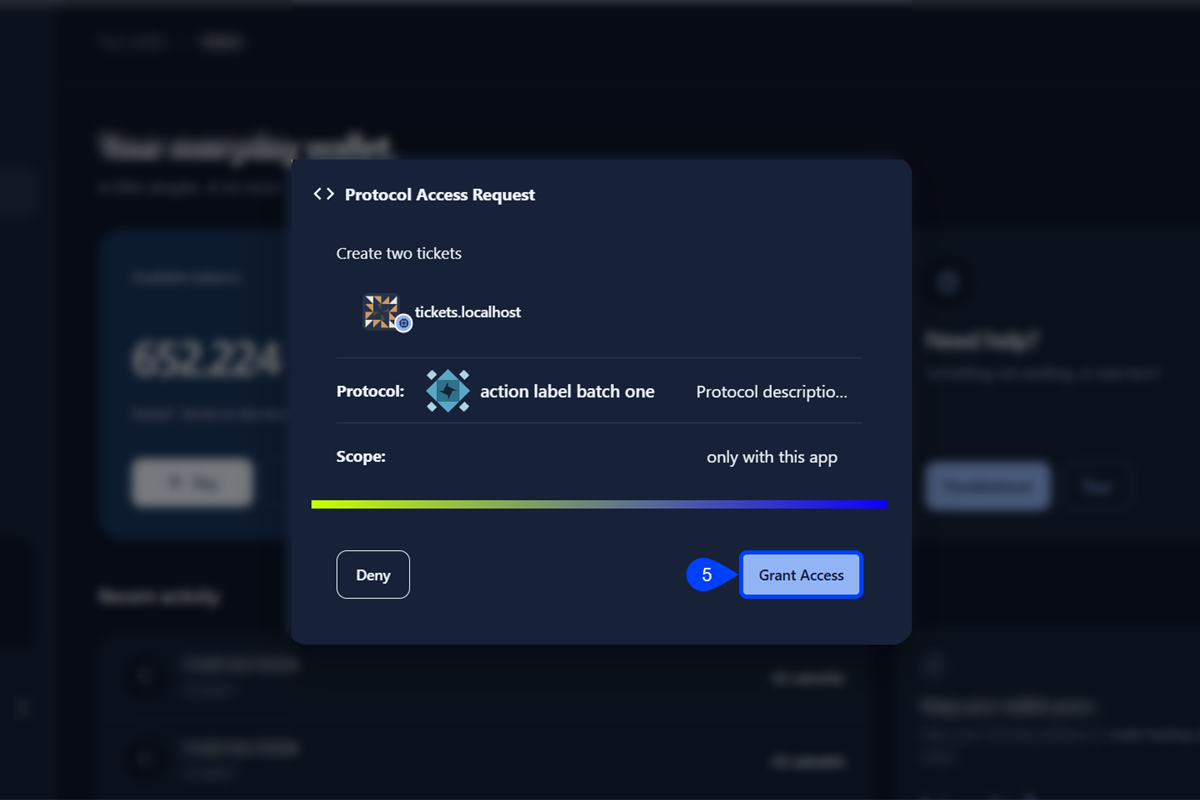
Next comes a Protocol Access Request for action label batch one, because each label is its own protocol permission. Select Grant Access.
Authorize the spending
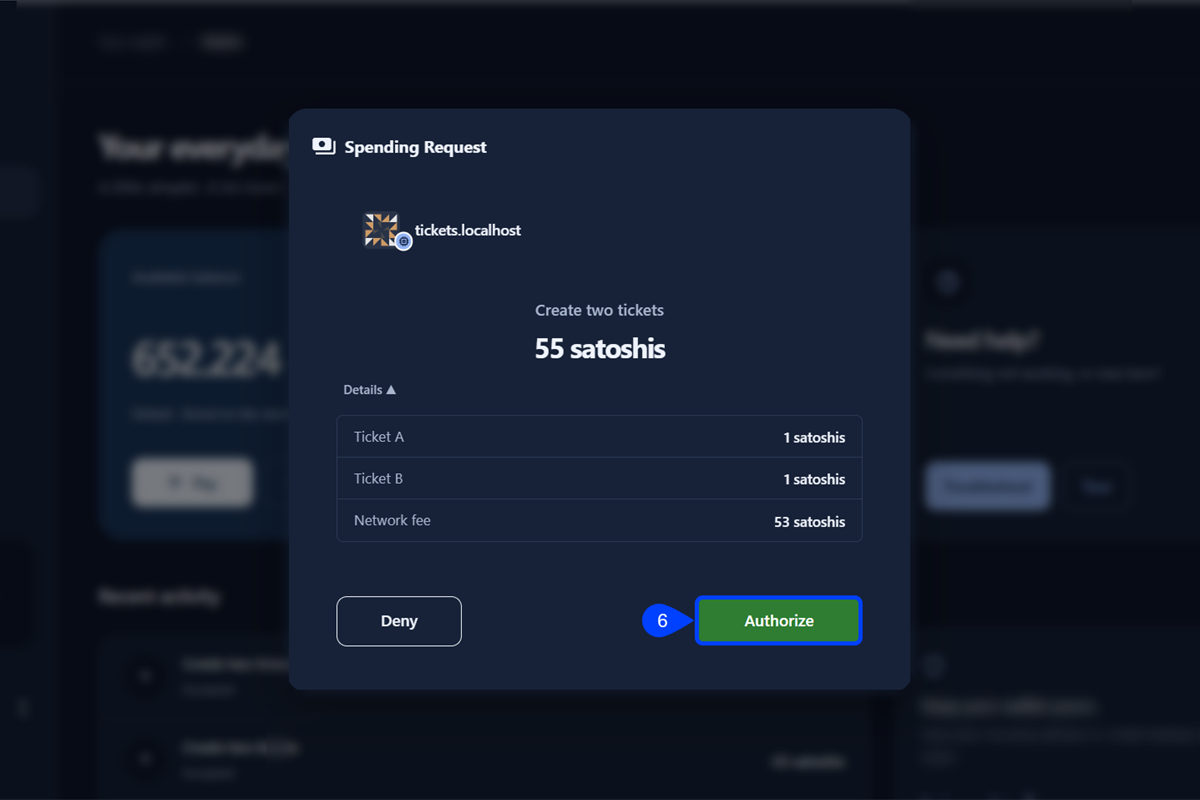
The last window is a Spending Request. It shows the description Create two tickets and an amount that adds the two satoshis of the outputs to the network fee. Blockchain transactions are irreversible, so check the amount and select Authorize.
The script prints the transaction ID, shortened here:
{
  txid: '777a…d73b'
}List the outputs
With the outputs in the wallet, the next step is to read them back by basket, tag and label. The three snippets share one file, list.mjs:
List by basket
Create list.mjs next to outputs.mjs. The limit and offset fields page through the result, and an offset of -1 reads from the newest output:
import { WalletClient } from '@bsv/sdk'

const wallet = new WalletClient('auto', 'tickets.localhost')

const result = await wallet.listOutputs({ basket: 'tickets', limit: 10 })

console.log(result)The result has the count and one entry for each output. The outpoint is the transaction ID and the output index, shortened here:
{
  totalOutputs: 2,
  outputs: [
    { satoshis: 1, spendable: true, outpoint: '777a…d73b.2' },
    { satoshis: 1, spendable: true, outpoint: '777a…d73b.1' }
  ]
}Filter by tag
Narrow the same call with tags, in the same file. With includeTags set, each output returns its own tags:
const vip = await wallet.listOutputs({
  basket: 'tickets',
  tags: ['vip'],
  includeTags: true
})

console.log(vip)Only Ticket A carries vip, so totalOutputs is 1. Each output returns its own tags, shortened here:
{
  totalOutputs: 1,
  outputs: [
    { satoshis: 1, spendable: true, outpoint: '777a…d73b.1', tags: ['vip', 'row a'] }
  ]
}With several tags, tagQueryMode decides the match. The value all keeps the outputs that carry every tag, and any, the default, keeps the outputs that carry at least one.
Filter by label
Labels belong to the transaction, so read them with listActions. With includeLabels set, each action returns its labels:
const batch = await wallet.listActions({
  labels: ['batch one'],
  includeLabels: true
})

console.log(batch)The result has one action. Its satoshis is negative, because the transaction spent from the wallet, and its labels include batch one. The wallet adds labels of its own, such as admin originator tickets.localhost, and your app sees them. The result, shortened:
{
  totalActions: 1,
  actions: [
    {
      txid: '777a…d73b',
      satoshis: -55,
      labels: ['batch one', 'admin originator tickets.localhost', …]
    }
  ]
}With several labels, labelQueryMode takes all or any and works like tagQueryMode.
Manage the permissions of the app
The user decides what an app may do, and the app can ask for its permissions one at a time or all together.
Review what the app may do
The user manages every grant in BSV Desktop, and your app can point to this screen when a request is denied:
In the card of your app, select Access.
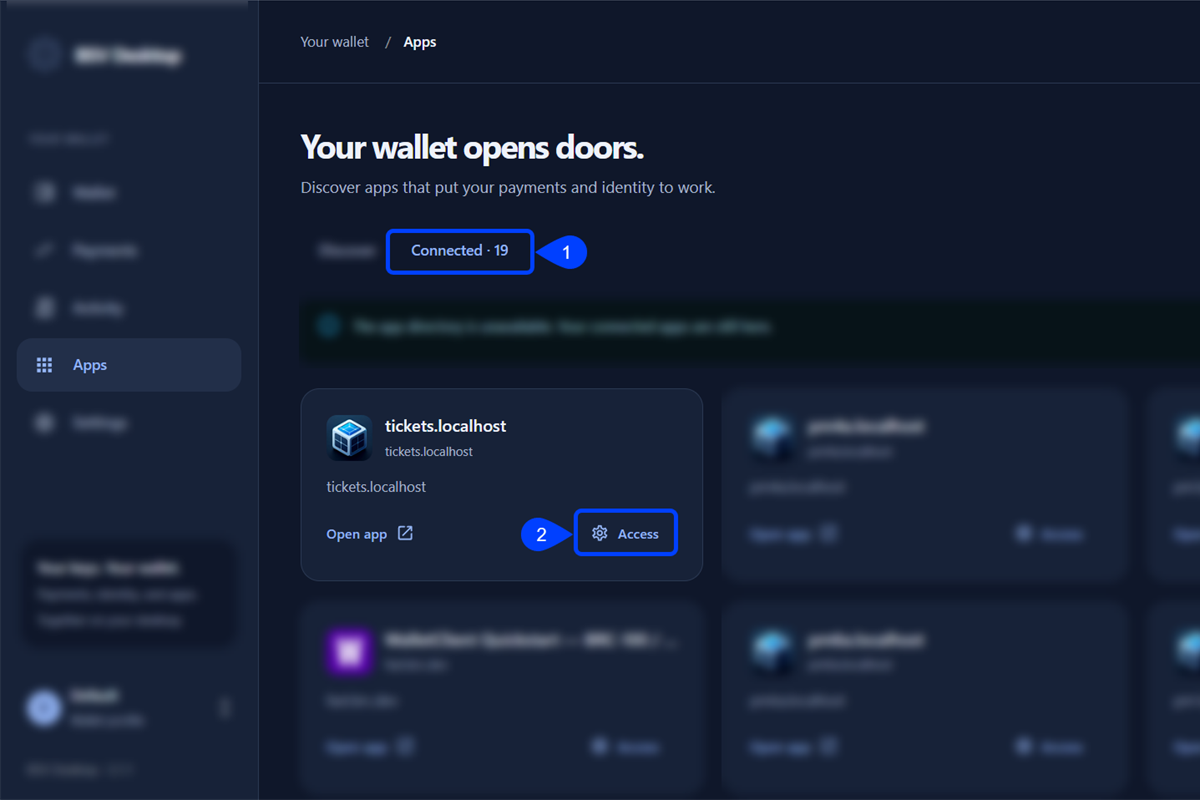
Open Protocols to see each label of the app as action label <label>.
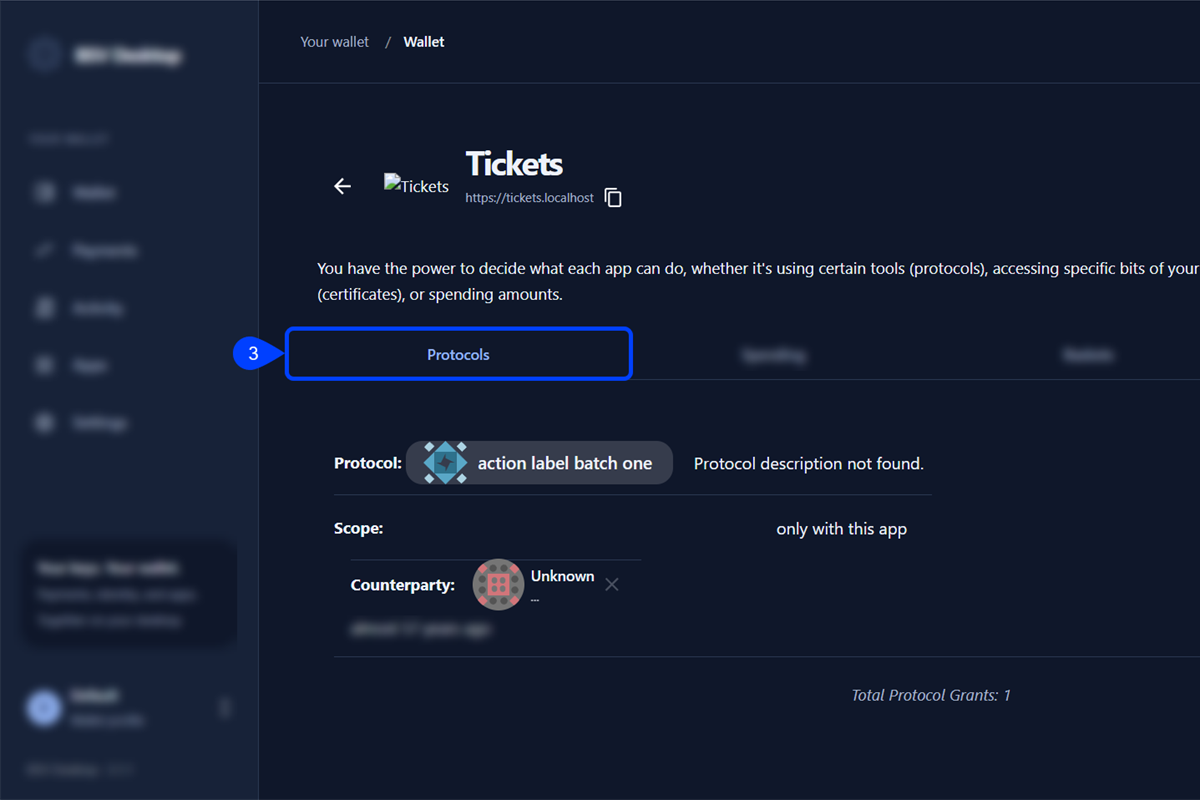
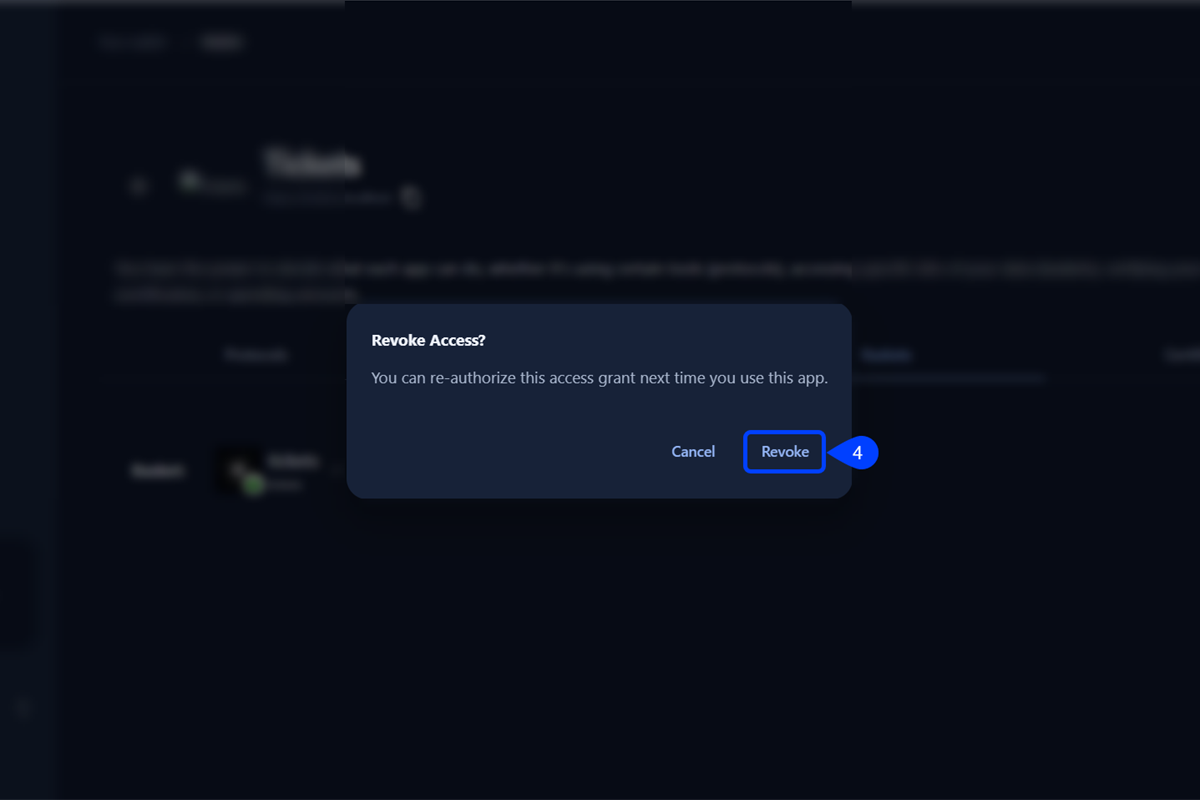
Open Baskets to see the baskets the app may use. Select the × next to a basket and confirm with Revoke. BSV Desktop records the revoke as a transaction with a network fee.
Request all permissions at once
An app that needs a basket, several labels and a spending limit can ask for them in one window by declaring them in a manifest:
Declare the permissions
Serve a manifest.json from the root of the domain that hosts your app, so it is at https://YOUR_DOMAIN/manifest.json. Replace YOUR_DOMAIN with the HTTPS domain of your app. The wallet reads the metanet.groupPermissions object:
{
  "name": "Tickets",
  "short_name": "Tickets",
  "metanet": {
    "schemaVersion": 1,
    "groupPermissions": {
      "description": "Permissions the Tickets app needs",
      "spendingAuthorization": {
        "amount": 1000,
        "description": "Create tickets and pay the network fee"
      },
      "basketAccess": [
        { "basket": "tickets", "description": "Store the tickets" }
      ]
    }
  }
}The amount is a monthly spending limit in satoshis, and the window shows only that amount. A description on a basket entry appears as the reason for that basket.
Open the app from that domain
Load your app from YOUR_DOMAIN and make the first call that needs one of the declared permissions. BSV Desktop opens one Select App Permissions window with the app name from the manifest. It lists every item that is not yet granted, each with a box that is ticked by default. The user can untick items before approving, and the call goes through only if the permission it needs is approved.
Troubleshooting
Call fails with HTTP status 400 #
The user denied a request, or the wallet refused the call. WalletClient shows only the status. The response of BSV Desktop carries the reason: Permission denied. for a denied basket, label or spending request, and The user has denied the request for permission. for a denied grouped request. A denial is not remembered, so the next call opens the window again.
Granted basket asks for permission again #
The wallet compares basket names exactly as typed. TICKETS, tickets with spaces around, and an empty name each open a new request. Use the same lower case name, with no spaces around it, in every call.
Reserved basket name is rejected #
The name default and any name that starts with admin are reserved for the wallet. The call fails at once with Basket "default" is admin-only. and no window opens. Pick another name.
Long basket name is rejected #
A long basket name fails with The tag parameter must be no more than 300 length. The usable limit is shorter than the 300 in the message, and the message says tag for a basket. Keep names short.
Script cannot find BSV Desktop #
A script that creates WalletClient without an originator fails with No wallet available over any communication substrate. even while BSV Desktop is open. Pass an originator as the second argument, as in the examples.
Next steps
With the outputs organized, move on to Mainnet or track your transactions with overlays: